Showing posts with label MAC. Show all posts

Thursday, July 14, 2011

New Stuff for Cool Girls: M.A.C. Face and Body Foundation

M.A.C.'s website describes this as
"A water-based, water-resistant foundation that provides long-lasting natural coverage for face and/or body. Ideal for all skin types. Face and Body Foundation provides sheer, natural looking coverage in an easy to blend, water-resistant formula. The long lasting-formula is available in a wide range of colours and contains several emollients to help moisturize and condition the skin. It delivers professional looking results that meet the exacting standards of beauty photography and is ideal for perfecting the face and body." -maccosmetics.com
(Source: google.com, search MAC Face & Body images)
This is a thorough review on M.A.C.'s Face & Body Foundation that I've been working on for a while, I wanted to provide you with all the information I could and all the little details I've noticed about the product, so sorry if it's quite lengthy! Hopefully this gives you everything you need to know so you can try it if you're interested. Now, onto the good stuff...

I've been in this dewy phase for a long time now, I started with Revlon ColorStay which I loved at first but once I started using it everyday for a while I realized it didn't give me the finish or color I was looking for. I then moved to Maybelline Fit Me Liquid Foundation and it was too oily and slippery. It didn't last on my skin throughout working and running around during the day, so this didn't work for me either. I never have owned a high street brand of foundation such as MAC just because I'm a believer that you can find equally great products without spending heaps of money. Face & Body was different though, for the amount of product, quality, and price it's the best deal and the best foundation I've used as of now. I don't want to be too positive saying "Oh this is the greatest foundation on earth!" I'm just sure it's the best one for my needs that I've tried so far.

This formula is only available at MAC stores (this means they don't carry it at places like Nordstroms) and retails for $32. This might seem pricey, but compared to the extremely large amount of product (4 fl. ounces). In comparision to other high street foundations; Nars Sheer Glow and Bobbi Brown Skin Foundation retail at $42 for 1 fl. ounce, it's actually a really good deal. Via makeupalley.com it's currently rated a 4.0 out of 5 and 70% of reviewers would purchase again. There are many shades available which is a double edged sword in the sense that you've got a lot of choice, but too many choices can get a little overwhelming for some. I've taken about 3 weeks of using this product everyday to give it a true, and thorough review. I was looking for a few key things for this makeup to provide me with, those are; a natural finish, builable coverage for acne spots / hyperpigmentation, true water-resistance, and a clean formula (as in it doesn't cause me more breakouts, etc.)

Here's what I found out:
  • Although it's best to get samples of maybe two shades to choose from, I just went in and asked them to match a shade that would best match my chest / body (my face is a little lighter than the rest of me) and it turned up being the perfect match. If your overwhelmed by the array of shades just ask an associate to help you, simple. Face & Body was exactly what I was looking for in terms of shade match.
  • I've applied this with both my fingers and a foundation brush and I've noticed that when using my fingers it gives a more natural finish, I think this is a result of the heat that's created when your fingers are massaging the product into the skin. This allows the product to sort of melt into my face, which left me with a really sheer, pretty, true skin finish. When applied using a foundation brush (RealTechniques Foundation Brush) it provides more coverage, I find this helpful if I'm having a particular issue with breakouts because it pops more product onto the needed area without leaving a cakey residue. 
  • Just because those are the only two application techniques I've tried there's tons of ways to apply your makeup and you're sure to find one that does exactly what you need it to do. Some other ways off application of this makeup are; a wet sponge like the Beauty Blender or something similar, or flat top brush, Sonia Kashuk / e.l.f. have one that people rave about (I'm going to try one of these next). You can get these brushes from Target for under $10. 
  • You will need to set it with a powder because it leaves a sort of tacky consistency on the skin if you don't. I kind of like this because it makes me feel like it's really sticking to my skin and will adhere to anything else I might apply. I have used BareMinerals Mineral Veil and Fit Me Powder. Both are working well. I apply after I've applied all my other face makeup.
  • I've noticed I don't need a concealer when I wear this, it evens everything out so well that my under eye circles have seemed to disappear. 
  • Applying e.l.f.'s Mineral Infused Primer onto my skin 2 minutes before application helps adhere the makeup to my skin and elongates the lasting power.
PROS
  • Long lasting
  • Really blendable, and sheer
  • Can be built up to cover problem areas 
  • Huge amount of product for the price and quality
  • Water-resistant
  • Good match with my skin [C4]
  • Perfect natural finish
  • Photographs beautifully, doesn't white out the face or create strange tones in pictures
  • Clean, hygienic product dispense
  • Doesn't dry darker on dry patches / get blotchy
CONS
  • Funky smell
  • Not the best if you need FULL coverage (but it does provide sufficient coverage for my acne and dark spots)
  • Watery consistency (this can be a pro or a con, I think it's good because it blends really easily, if it were any thicker it would be hard to move around the skin and dry uneven)
  • It's notorious for seperating in the bottle, this doesn't compromise the quality of the product as long as you just shake shake shake before applying! 
  • As for red spots, I do need to apply concealer. I noticed it's difficult to cover redness with this product.
I'm really in love with this foundation. It does everything I need it to and has all of the qualities I look for in a formula. I give this a 5 out of 5 rating for quality, price, formula, shade, overall product. I recommend this for people who have similar wants from their foundation as I do. At least run to you nearest MAC store and get a sample just to see how you like it!

*SWATCHES COMING SOON (My camera broke, I'm in the midst of fixing it and upon that I will update with swatches)

Here's some photo's of me wearing MAC Face & Body Foundation

What's your favorite foundation and what finish do you like?

XOX,
- Mj

Sunday, July 10, 2011

Goldstone Mother

My mom and I keep making plans to head over to the mall and check out the MAC counter. Unfortunately, our schedules conflict so much it hasn't happened in some time...I now know this was for a purpose. That purpose? MAC Semi-Precious Collection's Mineralise Skin Finish in Goldstone was made for my mother. Let me explain...

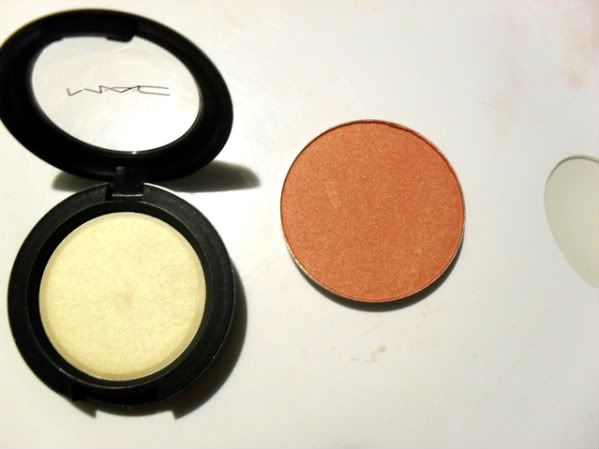
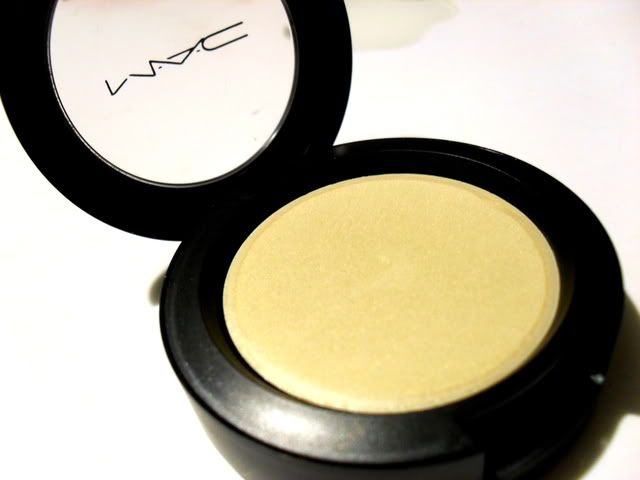
The reason we were heading to the MAC counter initially was because my mom was always asking about how I got my skin to "glow", I explained how I recently fell in love with MAC's Cream Colour Base in Pearl and it's now a staple in my makeup regimine. And that I was needing to kill my lem for MAC's Face & Body Foundation (review to come soon!). I wanted her to get a piece of the pie so we headed out to the counter. While walking up to the Cream Colour Base's a sales associate pops up and asks us if we need anything, my mom explains her situation and she brings my mothers attention to the loose pigments. (A bad idea for mature women) However, the sales associate didn't seem to think about that and readily popped on some pigment to my mothers cheekbones (which are amazing by the way) and says "Oh that looks great!". Mom turns around and I am suddenly noticing that she has wrinkles I'd never noticed before, I immediately turn her attention away from this product. I don't know if the MAC girl didn't quite understand what we were looking for but this was not it, our goal was to find her something to give a youthful glow. Not to accentuate features that otherwise are invisible. I turn my mother around to distract her from getting sucked into purchasing this, and point her attention to MAC's latest collection Semi-Precious. I really didn't think we'd find anything too amazing her but lo and behold Mineralise Skin Finish in Goldstone.


"A luxurious velvet-soft powder with high-frost metallic finish. Smoothes on; adds buffed up highlights to cheeks, or an overall ultra-deluxe polish to the face?" (Source: maccosmetics.com)
(Source: Temptalia.com)
MAC describes this as having a brown base with a rosey pink, white and gold inner circle. I find this product especially wonderful because of it's double features. You have the warm shimmery bronze surrounding a perfect pink highlight or blush depending on application. Or you can mix the two for a customized cheek color. A $28 two-in-one limited edition product from MAC isn't so bad. There's also two other Mineralize Skin Finishes and a few other bits & bobs I'm sure you'll enjoy. Here's my beautiful mother wearing it! Notice how the light hits her cheek bones and gives that amazing glow. 
I definitely recommend this product for women over the age of 30 (and under as well!) it's so wearable and seems it would enhance both warm and cool undertones. I know a lot of mature women are a little hesitant when it comes to wearing shimmery makeup, it's been dubbed as something only young faces can wear, MAC has changed this concept with Goldstone. I think I'll have to get some of this for myself now (; Check out temptalia's review of this, she has amazing swatches and photos that'll give you a great idea of what your purchasing before you even decide to. Her link is here. Anything from the Semi-Precious Collection is sure to turn up a gem in your makeup bag...I had to heheheh (;

What's your new favorite product?

XOX,
- Mj

Wednesday, June 15, 2011

Todays Face

The Kardashian sisters were behind todays face I always (almost) adore their makeup, they wear everything so well from sexy smokey eyes to fresh pink lips. Here are some photos I used for inspiration, and how I created my own Kardashian look!


Products Used:
- MAC Select SPF 15 [NC37]
- Fit Me Foundation [220]
- MAC Cream Colour Base [Pearl]
- bareMinerals Contour [Fresh]
- MAC Sheertone Blush [Springsheen]
- bareMinerals [Mineral Veil]
- Sephora Palette (stars * are over the colors used, they have no names)
- NYX Black Kohl Liner
- L'Oreal Voluminous Carbon Black
- MAC Lipstick [Myth]

For this look, I concentrated mostly on perfecting my cheeks and skin, because that is what I always find myself envying when seeing the Kardashians. I wanted to go for a pinky peach cheek with lots of sheen to provide that glamour glow we all know I can't get enough of.

Step 1 FACE:  Always make sure to properly prep your face for makeup. For me, this includes, cleansing, and moisturizing and using Fix +. Give this about ten (10) minutes to set and dry properly. Now, I was looking for a smooth sheer coverage foundation so I went with M.A.C. Select SPF 15 in NC37, for definition, I applied a darker foundation (Fit Me in 220) to the frame of my face. This is a technique that allows light to reflect from the center of your face and it gives a really beautiful effect. Just make sure the darker color isn't too  dark and also be sure to blend, blend, blend! Next, I patted M.A.C. Cream Colour Base in Pearl onto the apples of my cheeks, cheekbones and bridge of my nose. I like to use my fingers for this because it gives a glow, but a real natural one. Finally, I used bareMinerals Fresh into the hollows of my cheeks and all around my face.

Step 2 CHEEKS: Again, this is where I wanted the most focus to be so I use a few different products to create a one-of-a-kind blush that's perfect for my skin tone. First I popped on a layer of M.A.C Sheertone Blush in Springsheen, after that I whipped out my new Sephora palette and used the creamy peach / orange to provide the real color. After this I used the lightest color in the palette for extra highlight. I ran it over the blush I already applied and right above my cheekbones. Don't forget when you're finished with your face makeup to set it with a powder, I used bareMinerals Mineral Veil.
Step 3 EYES: It's NECESSARY when applying eyeshadow to use a primer as your base. Find one that works for you and use the heck out of it! I use MICABELLA's eye primer and apply it with a concealer brush. Using a medium shadow brush I applied a light shimmery champagne color all over my lid up to the brow bone, just a thin wash of color, nothing dramatic. I also popped this into my inner corner to brighten and open my eye. I used a similar shade but it's a tad darker for an all over lid color. Then, I applied a matte brown to my outer corner and a little into my crease, using a M.A.C. 217 brush. To enhance this I blended a bronze brown into my crease and beneath my lower lid. I used an NYX kohl liner to line my upper lashline, as well as in both my top and bottom waterlines. I feel like the dark black against the whites of my eyes really makes them pop. And finally popped on a few coats of L'Oreal Voluminous Carbon Black mascara.

Step 4 LIPS: I mixed two lipglosses to create an earthy nude pink that I frequently see Kim Kardashian rockin'. Before I put the gloss on I ran M.A.C. lipstick in Myth over my lips to lighten them up a bit so the true color of the glosses would pop through better. I applied the gloss with a drugstore lip brush.
*NOTE: I put stars (*) over the products I used in the Sephora palette so you could color match if you don't have that exact one.

Final Look
Notice the glow radiating out from my cheeks, this isn't from the flash, it's a result of the Cream Colour Base layered beneath the blush, and then a powder highlighter over that. I really love using this technique.
When applying eyeshadow, another layering technique gives great results. If you use a white shadow pencil (like NYX Milk, or Urban Decay Yeyo) in the inner corners of your eyes and blend them with a liner brush. Apply your shadow as usual and then go over the areas where you put the pencil liner with a light shimmery shadow. This will guide lots of light to that area, brightening it up a thousand fold. It makes the eyes look very lovely.
These side shots showcase the face makeup at it's best. Notice the deeper, darker contour blending into the peach blush blending into the highlighter. 

If you guys have any other questions, just ask! 

XOX,
- Mj


Thursday, June 9, 2011

New Stuff for Cool Girls: M.A.C. Haul

Hello friends! Sorry about the technical difficulties we had on the site today in regards to photos, thankfully, everything is back to normal and everyone's happy! Yay! So anyways, a lovely friend of mine just gifted me some holy grail M.A.C. products. Since I'm new to the makeup world I have never owned any of these products and thought it would be perfect to share me experiences with them on here to share with all of you! Since I just got them today I want to wait about a week to give my review, just so that it's thorough and I have time to build my opinions and learn the optimal ways these products are used. As of right now sitting here looking at them is even wonderful so I'm sure I'll enjoy them even more when I put them on! Haha! The products are as follows:
  • M.A.C. Cream Colour Base in Pearl. "Versatile and multi-purpose, Cream Colour Base can be applied directly to bare skin, or layered over foundation, moisturizer, or powder. Apply with a brush, sponge, or fingers.  Colour effects range from a light veil to highly dramatic, depending on method of application. Fragrance-free." 
  • M.A.C. Sheertone Shimmer Blush in Springsheen. "Colour for the cheeks and face. Various formulas. Different looks...Highly pigmented, long-lasting powder. Applies evenly. Blends well. Stays put. Remains consistent. Strong payoff."
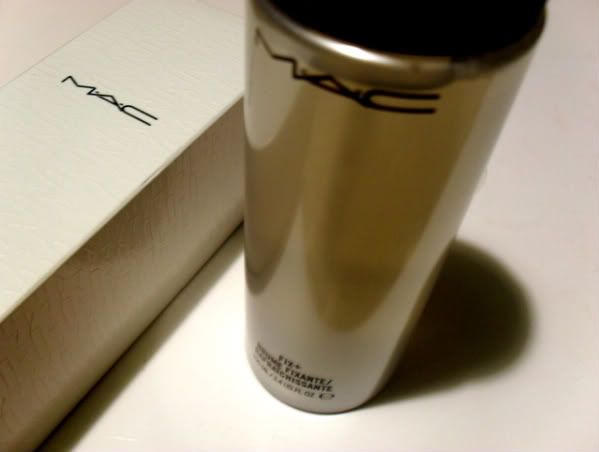
  • M.A.C. Fix + Skin Refresher and Setting Mist. "An aqua-spritz of vitamin and minerals, infused with a calm-the-skin blend of green tea, chamomile, cucumber, topped off with the fresh, natural, energizing scent of Sugi. Adds radiance, finishes makeup. Spray it on. Skin drinks it up!"


(Source: http://www.maccosmetics.com)


Thoughts so far
Cream Colour Base (CCB) in Pearl. I was pleasantly surprised when I saw this as the pot the product comes in was larger than I expected. This will definitely last me a long time! The color is a sheer (but buildable) pearl with a hint of gold highlight. Upon reading reviews from makeupalley.com I learned this product can be used in a number of ways; some of those being, on the cheek as a highlight (underneath or over other products), down the bridge of the nose, and on the eyelid as a base (this will make whatever color you put over it POP (;  
Sheertone Shimmer Blush in Springsheen. This color is described on Specktra.net as a pinky / coral with a slight gold shimmer. When I swatched it, it seemed really sheer. That's something I need in a blush because I don't do the whole red circles on the cheeks like a doll look. My blushes need to be blendable and have a natural colored base so it almost looks as if I'm not wearing any. But blush addicts, don't let this deter you! Springsheen is super buildable and will give you a fresh peach from princess land look if that's what you heart so desires. A swatch for this can be found here.
Fix +. I haven't had much experience at all with this but it's intended for applying before and after you've put on your face makeup (I'd spray it before mascara to prevent any bleeding / fallout). It's supposed to set everything and soften it all up. I'm hoping to achieve a creamy satin finish with this so we'll see how everything goes tomorrow.

*I will be posting swatches and looks using these items and do a full review in about a week.

XOX,
- Mj <3